***Update – January 9th, 2020 ***
The methods described in this article have been superseded by the new Add Calculation Points — > Stairs command.
***
Stairs present an interesting challenge when placing calculation points in ElumTools. Adding area based points, such as space points or region points, isn’t a good option because the calculation grid will be flat. Planar face points also present a challenge as they would necessitate adding a separate calculation grid to each tread of the stair case (flexible but tedious). These challenges make stairs a good candidate for line based calculation points. Here’s a sample work flow.
- Create a Reference Plane following the profile of the stairs. This will typically be easiest in a Section View.
- Draw a model line on the sloped reference plane. This is typically easiest in a Plan View.
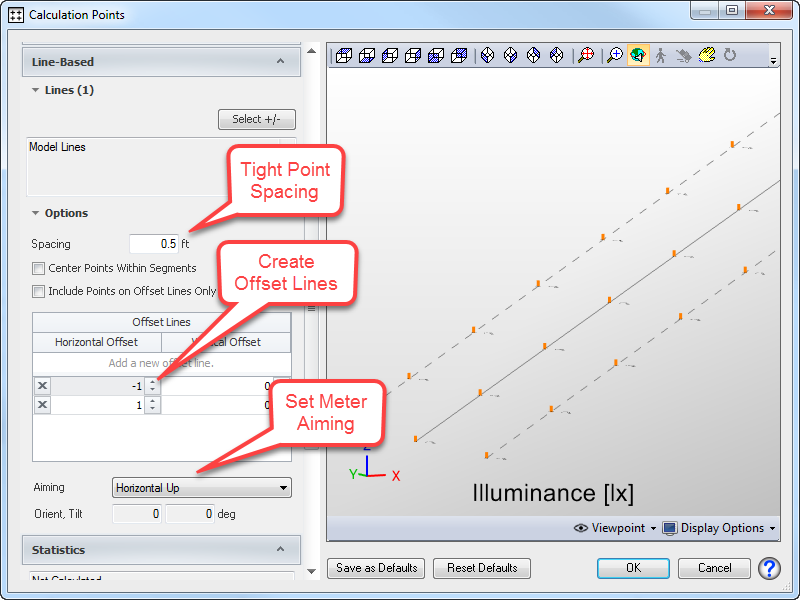
- Add line-based calculation points to the newly created model line, and use offset lines to create the grid.
Typically for stairs, you will want to define a tight point spacing to be used along the run of the calculation line. Offset lines can then be used to place points along the horizontal span of each tread.
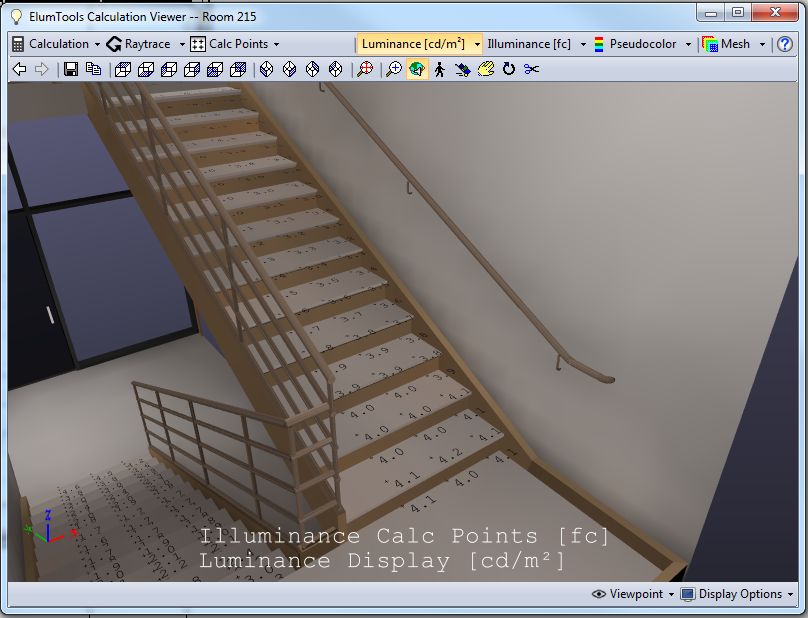
When calculating the stairwell, you will see the calculation points follow the profile of the stairs based on the spacing specified in the Add Points dialog. Some iteration may be required to get points located in the necessary locations, particularly for complex staircases. But by using line based points you will save the time of having to locate a separate grid on each tread.
See the video below for an illustration of the steps described above.


