If you’ve ever tried to do daylight calculations, using any piece of software, you’ve likely run into questions and perhaps even problems. Here are some of the issues you may face when performing daylight calculations inside of Revit, using ElumTools.
Where’s the light?
Often when performing your first daylight calculation you will get a black rendering, zero reported foot candles, and other symptoms indicting the program didn’t “see” any daylight. This is usually due to an interesting quirk in how Revit defines rooms and space boundaries.
When you create a room or space in Revit, the default boundary line is placed on the interior side of the walls. This makes perfect sense if you’re using rooms and spaces for square footage calculation, programming, etc… But it often results in the windows not being contained in the space. See below.
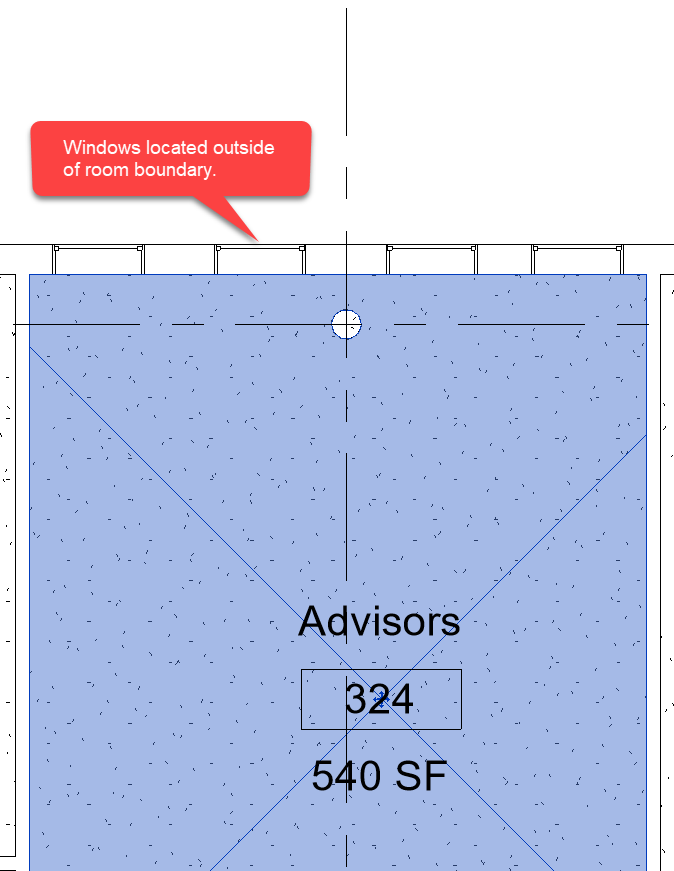
There are a couple options for fixing this. One is to increase the boundary buffer setting as described in this article. This is usually the easiest solution when working with rooms and spaces, but can make the rendering look goofy if you’re not careful.
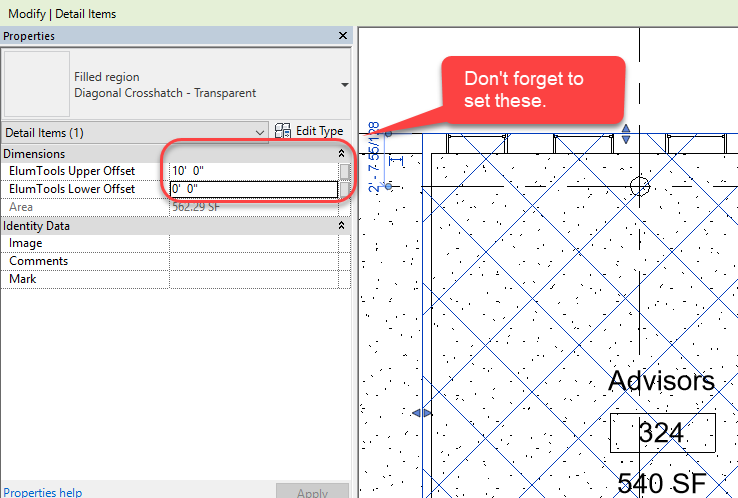
Another completely different approach is to use Filled Regions for the calculation. Filled Regions in Revit tend to be more flexible than rooms and spaces in regard to the boundary location. It’s easy to make the boundary be wherever you want, and easily include the fenestration. The only catch is you may need to specify the upper and lower offset parameters of the Region, especially when working with multi-story buildings.
That didn’t work…
Another reason you might not get daylight has to do with the glazing definition and orientation. To accurately compute daylight, ElumTools needs to know 2 things about the glazing.
- Whether it’s an exterior or an interior window.
- If exterior, which side faces the exterior.
Conveniently, Revit also needs to know similar information in order to make some of the Autodesk energy analysis tools work. So the Revit ecosystem is already set up to specify both pieces of information.
For example, all walls in Revit have a type parameter to specify whether it’s an interior or exterior wall. In ElumTools, windows which are hosted to exterior walls are considered for daylighting. Windows hosted to other wall types are not. Similarly, roofs are considered exterior by definition, to easily consider skylights.
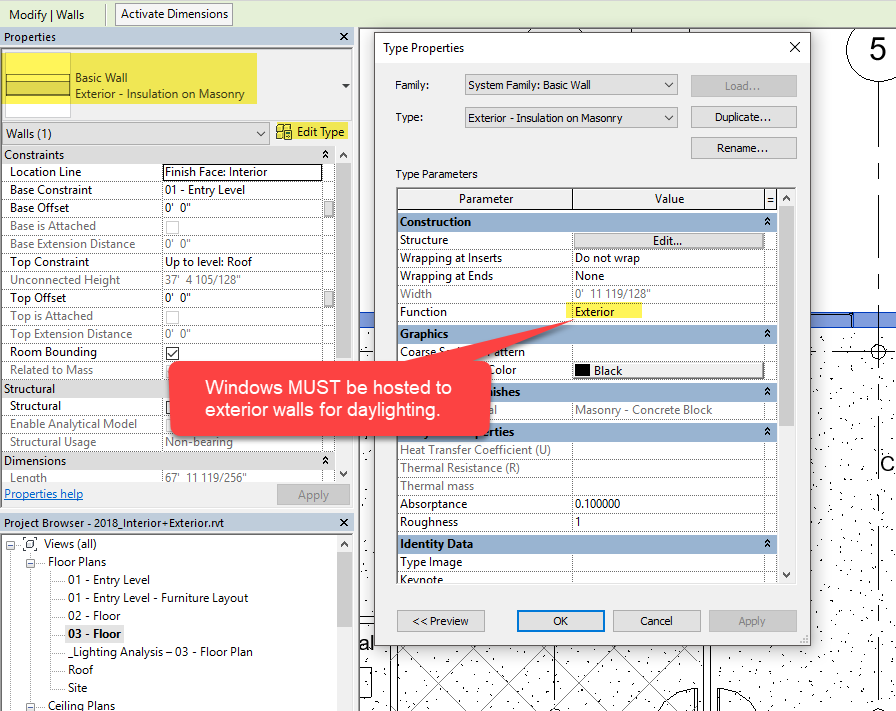
The issue of defining the exterior side of the window is also handled on the Revit side and is described in detail here.
Okay that sorta worked. But what about Daylight Factor calcs???
Daylight factor is an interesting metric developed over a century ago in the UK. The original motivation was mainly to assist in resolving Right to Light disputes; an important concept in the British legal system dating back to the early 19th century.
The calculation of Daylight Factor is simple enough in concept. Wikipedia defines it as follows.
“In architecture, a daylight factor (DF)[1] is the ratio of the light level inside a structure to the light level outside the structure. It is defined as:
- DF = (Ei / Eo) x 100%
where, Ei = illuminance due to daylight at a point on the indoors working plane, Eo = simultaneous outdoor illuminance on a horizontal plane from an unobstructed hemisphere of overcast sky.”
This simplicity of this calculation made Daylight Factor an attractive metric during the 1800s, a time when computers looked like this. More modern software tools, like ElumTools and Licaso, have mostly rendered Daylight Factor obsolete. More sophisticated analysis is now not only possible, but relatively easy to execute by anyone with a PC on their desk and a little bit of lighting know-how. But many codes still ask for Daylight Factor analysis. So here’s how to do it in ElumTools.
Step 1…
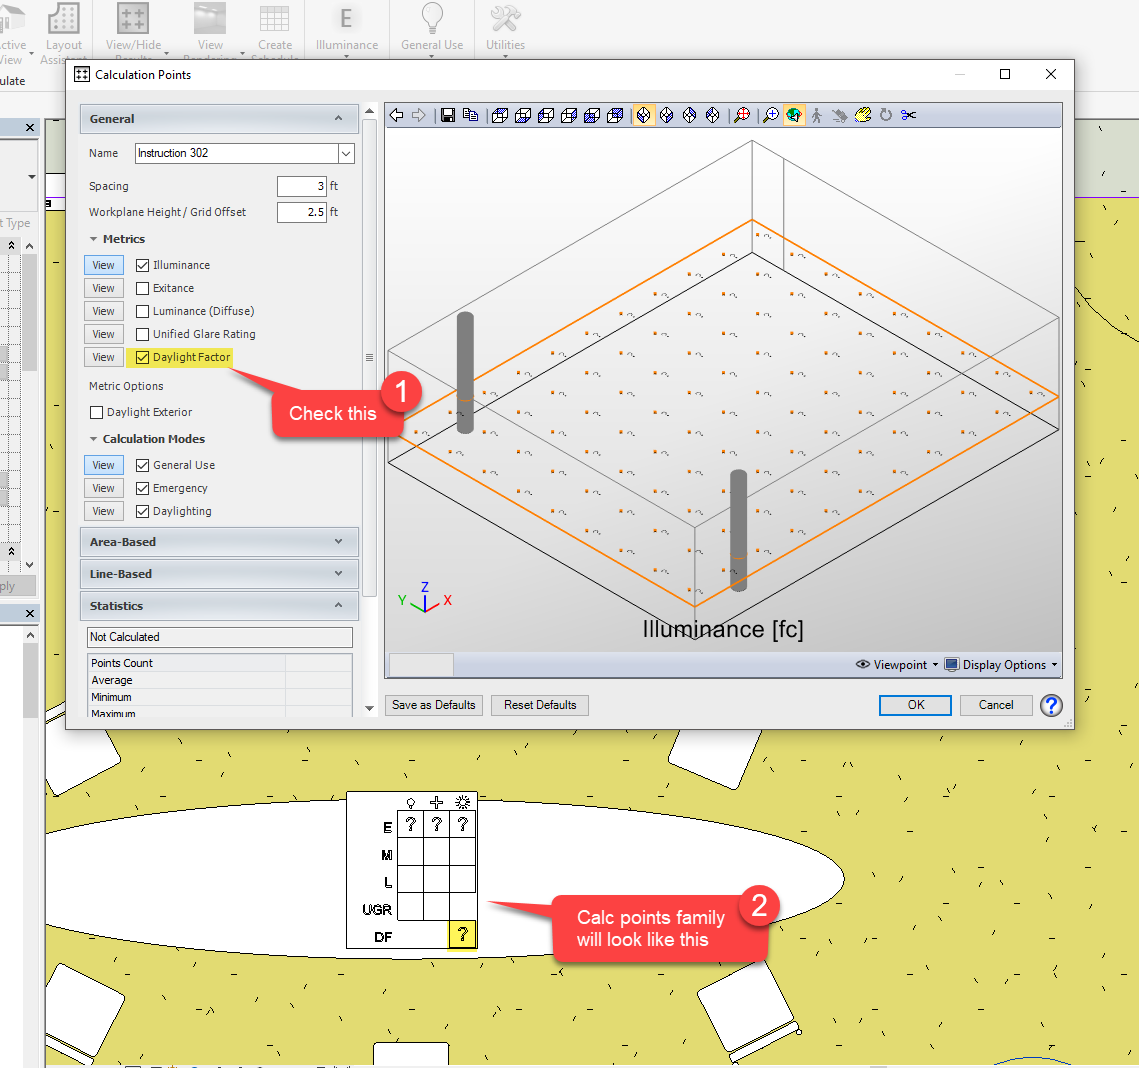
When defining the calculation points, you need to check the box for daylight factor as shown below. Daylight Factor is disabled by default, so the calculations go faster (most users only need to consider illuminance). But it’s easy to enable, when needed.
Step 2…
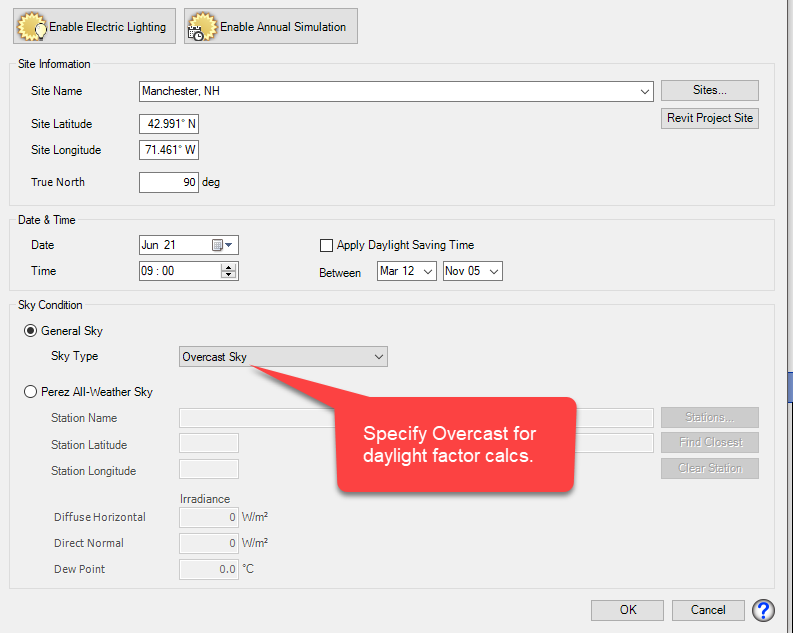
The definition of daylight factor requires an overcast sky (a reasonable assumption for English architects). As such, the sky type must be set to “Overcast” in the ElumTools Daylight Parameters dialog as shown below. Otherwise, Daylight Factor will not be calculated.
How about Materials?
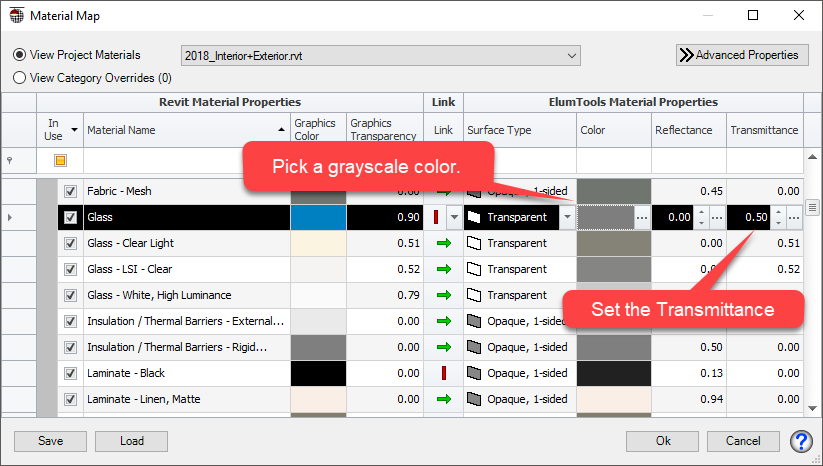
Another critical input for daylight calculations is the Visible Transmittance of the windows. Commercially available glazing can vary widely in regard to the percentage of light it transmits to the interior of the building. So it’s a requirement to tell ElumTools what you’re using. This is done in the Material Mapping dialog.
It’s also important to note that glass in Revit will typically have a blue Graphics Color by default. With ElumTools, it’s often a good idea to change this to a gray scale color to avoid a fishbowl look/feel to the renderings. See below.
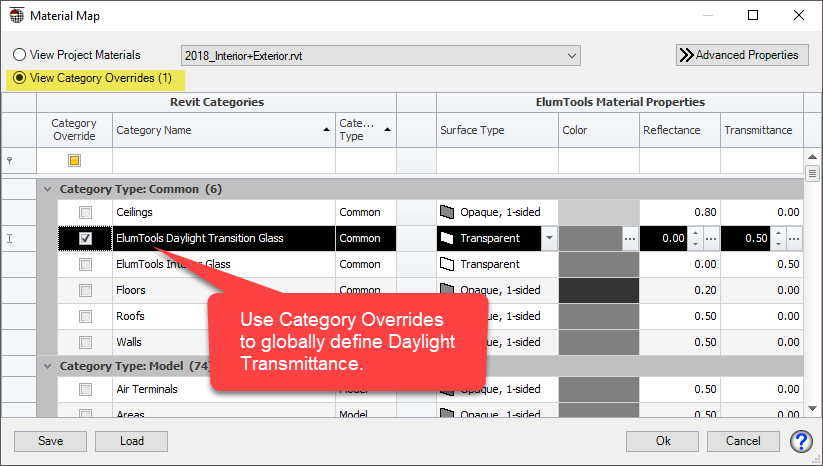
If you know that all the windows will be the same, it can be easier to use category overrides to globally define the glazing properties.
