Luxiflux Zonal is a zonal cavity (lumen method) calculation tool allowing a potential customer to quickly estimate the light level (illuminance), number of luminaires, power density and lighting layout, for a simple rectangular space. Click the button above to try it out!
Luxiflux Zonal uses XML based input and output to allow your webmaster flexibility in programming appearance and function. It is easy to customize screen appearance with your logo and brand colors.

How does it work?
When Luxiflux Zonal opens, click on the top level of control icons to open a specific input section.
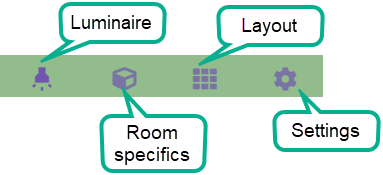
Each top level has a secondary level of control to open specific input areas.
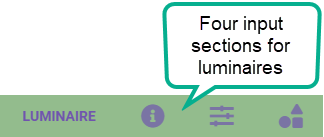
Typically for first time visitors, go through the input sections left to right. Once familiar with the software’s operation, you can skip around and get results in seconds. The software will compute instantly when it has enough input.
Luxiflux Zonal Input
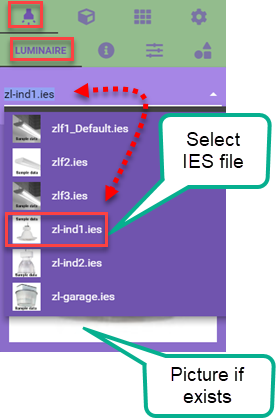
Click on the Luminaire icon on the top level followed by the “LUMINAIRE” icon on the second level. Select a photometric file from the pull-down menu. The software is XML driven to present only the photometric files that are relevant to the browser’s location in the manufacturer’s website (as programmed by the webmaster).
If photographic images exist (we strongly recommend manufacturers include this capability), the tool can display them to help browsing clients understand their selection.
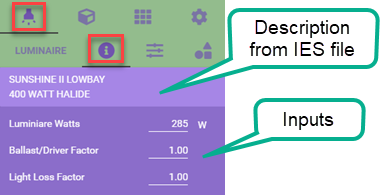
From the LUMINAIRE top level, select the Information icon on the second level.
Descriptive information is pulled from the IES file [LUMINAIRE] and [LAMP] keywords in this case. This is programmed on the XML level by the manufacturer’s webmaster.
Inputs allow changes to the Watts figure as retrieved from the IES file and two different factoring options; Ballast/Driver Factor and Light Loss Factor.
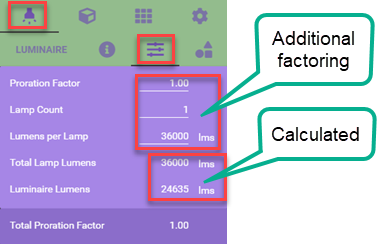
From the LUMINAIRE top level, select the Adjustments slider icon on the second level.
This input section exposes an opportunity to factor the results by number of lamps, lumens/lamp or general proration factor. A total factor is shown at the bottom. Calculated metrics are obtained as changes are made to the inputs.
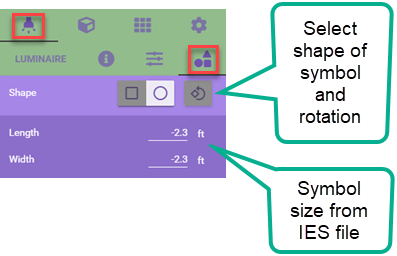
From the LUMINAIRE top level, select the Shape icon on the second level.
Luminaire Symbol shape is rectangular or circular and automatically selected and sized based on the luminous dimensions in the IES file. You can change the rotation of the rectangle if desired (this has no impact on the zonal cavity calculations).
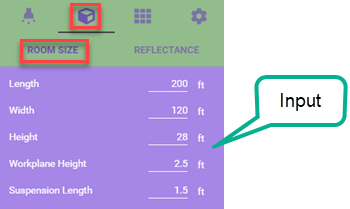
From the Room top level, select the ROOM SIZE icon on the second level.
Enter the Room Length, Width and Height (floor to ceiling).
Enter the workplane height for the illuminance estimate. Enter Zero for the floor.
Enter a Suspension Length if the luminaire is suspended (distance to bottom of luminaire). Enter zero for recessed luminaires.
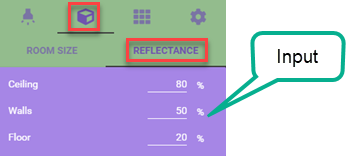
From the Room top level, select the REFLECTANCE icon on the second level.
Enter the surface reflectances for ceiling, walls and floor. Default values can be set by your webmaster in the XML input.
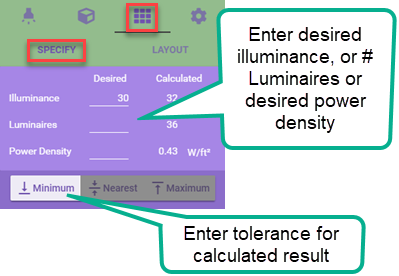
From the Layout top level, select the SPECIFY icon on the second level.
The Specify section is used to set the target Illuminance level for the calculation. Options include the ability to compute based on a set number of luminaires, or for a target power density.
The tolerance for the computation can be MINIMUM – do not go below, NEAREST – closest result +/-, or MAXIMUM – do not exceed.
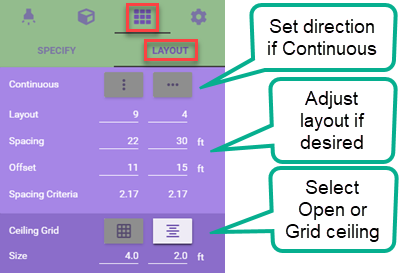
From the Layout top level, select the LAYOUT icon on the second level.
If using a continuous row of luminaires, select the appropriate direction.
You can adjust the layout as desired. The Spacing Criteria is calculated from the entered spacing values.
Select a ceiling grid if necessary and enter the tile size. Otherwise the grid selection is set to Open.
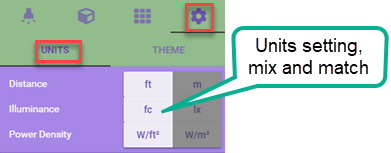
From the Settings top level, select the UNITS icon on the second level.
Set the preferred units. The defaults can be set in the XML input. Mix and match is permitted.
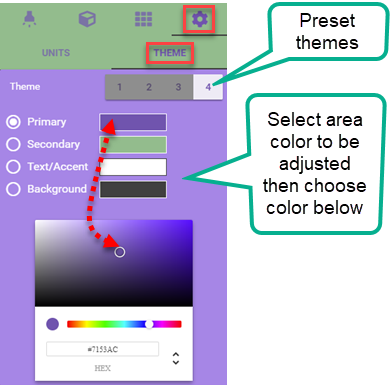
From the Settings top level, select the THEME icon on the second level.
This area’s visibility can be controlled in the XML input. It is exposed for developers to implement their brand colors.
When colors are selected, note their HEX identification and use this in the XML input. Webmasters will most likely want to hide the Theme section from end users.
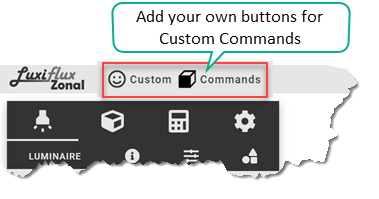
Add Custom commands to launch your own custom process using the data generated by Luxiflux. You can do this with buttons or after Sharing or Printing events. You can also override the help destination to provide your own directions. Check out the Documentation for more details.
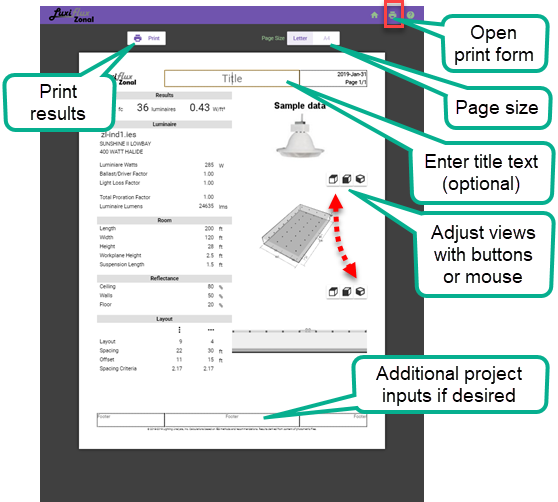
Luxiflux Zonal has a clean single page printed output. Click the Print icon on the toolbar (top of screen) to open the form as shown.
Adjust the page size (Letter or A4) and adjust any of the views using the mouse or set views buttons.
Enter any descriptive text in the rectangles provided on the top and bottom of the form.
Click the Print button.


 Watch our 5 minute Luxiflux Zonal Introduction!